 Though the cloning tool has been around for many years now, it still remains one of the most important features of any photo editing software. That’s because its uses are vast and varied and can be used to enhance or alter your image in any number of ways.
Perhaps you’d like to hide blemishes on a portrait photo, or completely remove unwanted items or objects to clear up an otherwise perfect landscape shot. It can even be used to add more objects into a scene – perhaps to create a busier looking street or store – or to clone yourself or others into a photo.
It’s an incredibly powerful feature – and not without questions of ethics – but it’s not necessarily easy to use. That’s why we’ve got some tips to help you understand just how to make the most of the cloning tool.
Using the Cloning Tool
Different programs handle cloning in different ways. Many believe that Photoshop is the only program capable of doing so, but this is far from the truth. Equivalent professional programs also offer this feature, such as Xara Photo & Graphic Designer – though in this case it’s uses a different method to Photoshop. Even some cloud editing tools include the cloning tool, such as Fotor. Ultimately there are two common types of cloning methods, here’s how to use either:
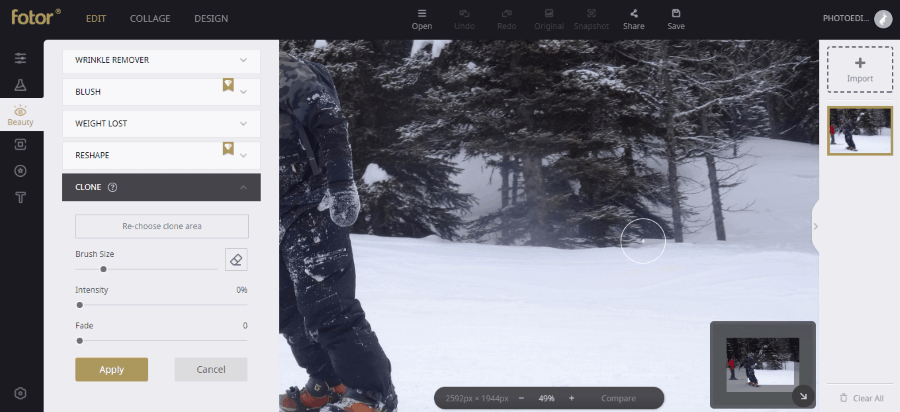
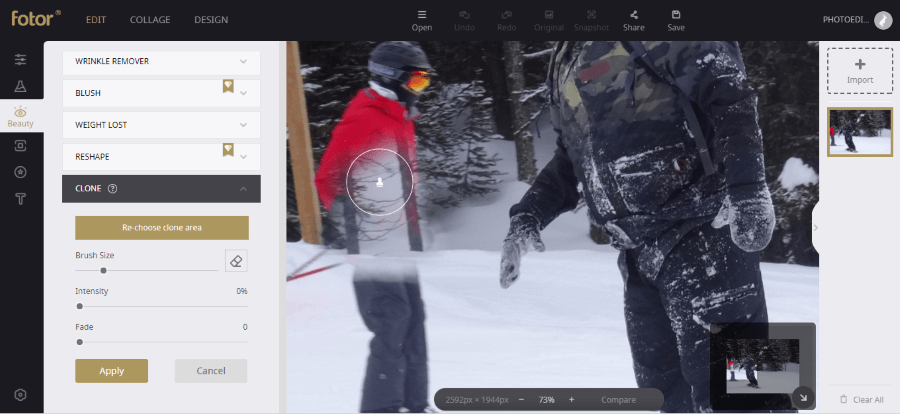
Method 1: Source Cloning (With Fotor)
- With the cloning tool active, choose the section that you want to copy from. Typically this means holding down the Alt/Cmd button and left-clicking on the area to copy, but it can differ between programs.
- Release the Alt/Cmd button; the next left-click you press will ‘activate’ the brush, meaning that wherever you click next will be painted over with the chosen area in the first step.
- Paint over the image, cloning over the photo in the desired position until happy with the results.
- At any time you can reselect the chosen cloning area by holding the Alt/Cmd button.
Selecting an Area for Copying
Painting Over With the Cloned Object
The Final Touches
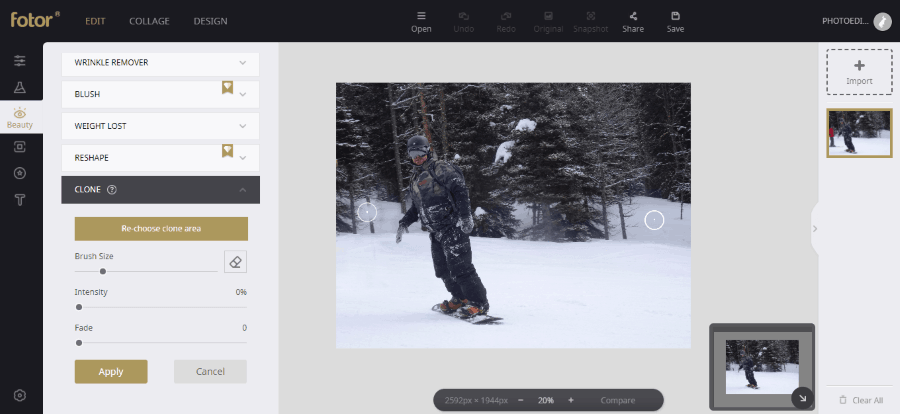
The Photo After the Cloning Process

There are two deviations of this method depending on the software, differing by how they utilize the chosen area. Some will lock the distance between the chosen area and the desired cloning area, meaning that after activating the brush in step two the mouse movements will correspond to which part of the cloned area is copied over.
Some programs, however, will reset this distance with each new left click, which makes it easier to copy the same object multiple times into an image but must be reselected if you want to continue cloning over the same area from a slightly different chosen area for perfect cloning results.
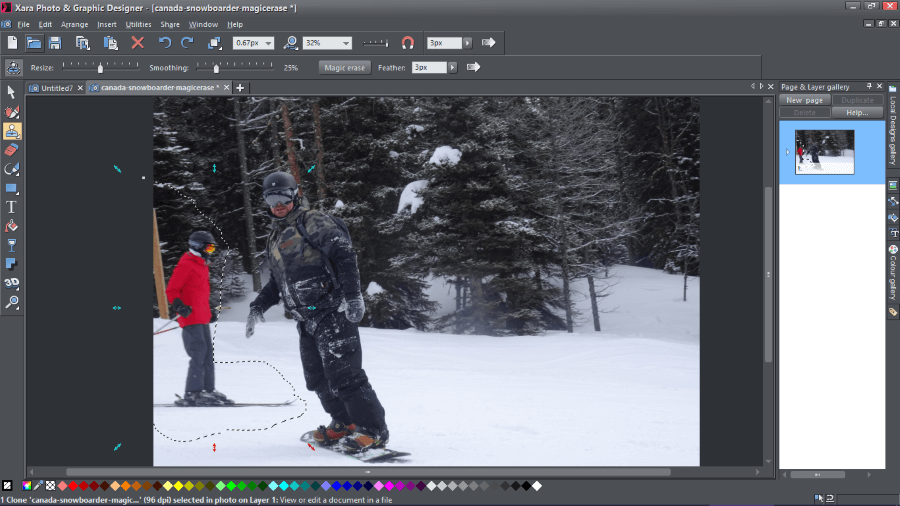
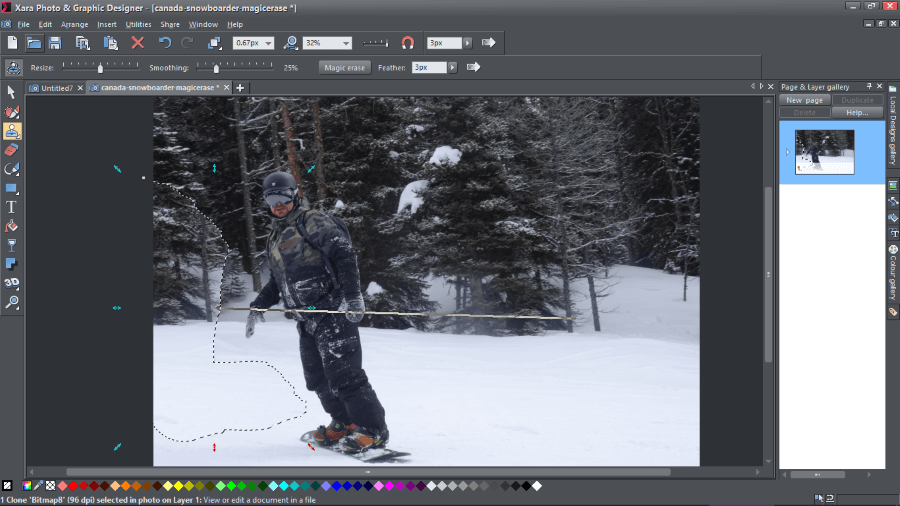
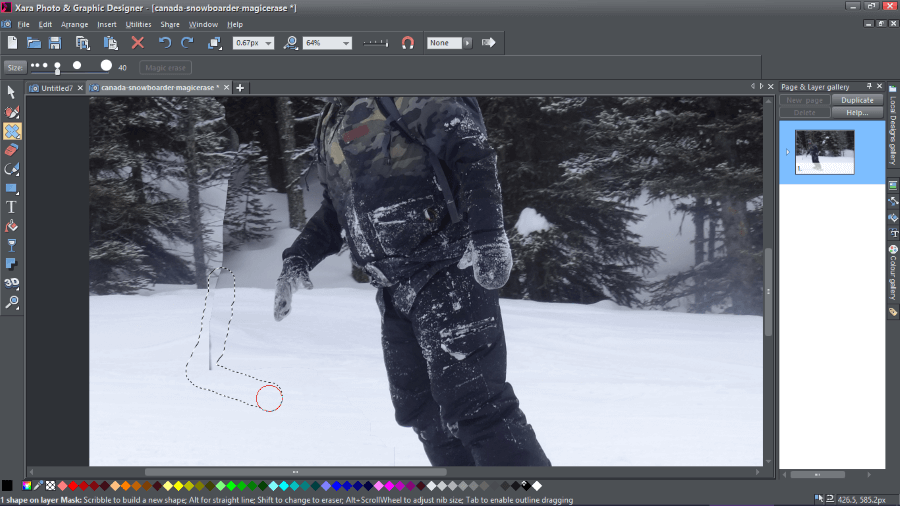
Method 2: Destination Cloning (With Xara)
- Select the area that you want to clone over. Since this will be an exact copy, try to consider how the section you want to copy looks and how much space you will need.
- Drag over or click the area that you want to be copied. This can typically be reselected multiple times, allowing you to perfect the cloning without concern.
- Once happy, press Esc to deselect the newly cloned area. If you’ve trying to remove something from the picture, consider reusing the tool – or something like the Heal Brush – to believably blend the newly cloned area into the surrounding picture.
Selecting Object for Removal
Filling Out the Cut Area
Refining the Cloned Area
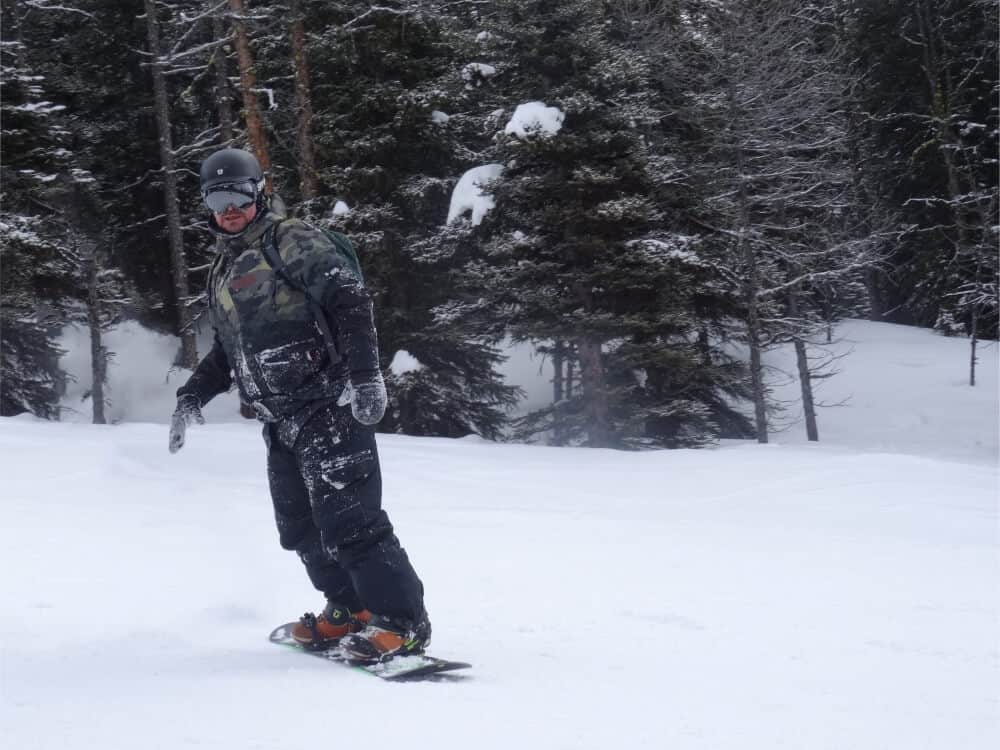
The Final Result
Sometimes destination cloning can also work in reverse, where you will select the area you want to clone and drag it elsewhere onto the photo.
General Tips on How to Use the Cloning Brush
Because we know it’s not as simple as clicking from one area to another when using the cloning tool, here are some further suggestions on how to make the best of the brush:
Zoom In
Getting in closer, even beyond the 100% size, will give you greater precision with the brush and give you less space to mess up. The larger the cloning area, the more likely you are to clone parts of the photo you don’t want.
Alter Brush Size and Hardness
Knowing exactly what you’ll be copying over is important, so adjusting the size will help you pick what will be cloned. Similarly, it’s good to adjust the hardness based on your needs: if you’re copying an object elsewhere on the photo, use 100% hardness. If you’re trying to remove something from the photo, use a softer (roughly 50% but see what works) brush to ensure the blend is smoother and more believable.

Avoid Repetition
The human eye is great at picking up on repetition, so it’s important to ensure it doesn’t happen. If using source cloning, copy over from more than one source onto the same section to ensure no familiar looking patterns appear.
If using destination cloning, adjust the copy to make it look different; rotating or mirroring is especially useful for this, but altering size and slight color, brightness and contrast changes will be important, too.
Take Your Time
To get believable results you’ll need to put in a good deal of time when cloning. It isn’t a quick job and requires a lot of editing and reediting to avoid repetition. The more time you spend on it – zooming in and out to check the results as you go – will really help to make your finished photo look less ‘Photoshopped’.
Don’t Forget to Heal
Lastly, there are other tools to help out; check what options your software has. The Heal Brush is particularly useful – or equivalent – which will make context-sensitive changes to help blend in or fix any issues with the cloning.
Best Photo Editing Software of 2024
| Rank | Company | Info | Visit |
|
1
|
|
|
|
|
2
|
|
|
|
|
3
|
|
|
Share Your Comment